a t e v a n s . c o m

(╯°□°)╯︵ <ǝlqɐʇ/>

This is widely viewed as the proper way to do a startup, and if you work on a different schedule, you are likely to be told you are “doing it wrong” by employers, investors, and peers.  This is peer pressure deployed as a weapon. 

Partially it is simple hazing: the experience of shared suffering in the group context is believed by many to form stronger bonds.  (And, as with classical hazing, “I put in my dues, now you have to put in yours or I will look pretty freaking stupid now won’t I” causes the system to perpetuate itself.)

In addition to the hazing rationale, some portion of this attitude is just pure exploitation.

Astute.

The documentation is not clear about the date formatters

NSDateFormatter *dateFormatter = [[[NSDateFormatter alloc] init] autorelease]; [dateFormatter setDateFormat:@"EEE, d MMM yyyy HH:MM"];

What are the availabe dateFormats ????

Bookmarking this for later.

So, I was using a category to make our UINavBar have a clever gradient. I preferred to draw the gradient rather than use an image, so we can keep everything in code, cut down on file loading, resolution independence, yada yada yada. So, here’s how I did it:

#define UIColorFromRGB(rgbValue) [UIColor colorWithRed:((float)((rgbValue & 0xFF0000) >> 16))/255.0 green:((float)((rgbValue & 0xFF00) >> 8))/255.0 blue:((float)(rgbValue & 0xFF))/255.0 alpha:1.0]

@implementation UINavigationBar (CustomGradient)

- (void) drawRect:(CGRect)rect{
    [super drawRect:rect];
    CAGradientLayer *gradient = [CAGradientLayer layer];
    gradient.frame = self.bounds;
    UIColor *startColor = UIColorFromRGB(0x0d3660);
    UIColor *endColor = UIColorFromRGB(0x080f1d);
    gradient.colors = [NSArray arrayWithObjects:(id)[startColor CGColor], (id)[endColor CGColor], nil];
    [self.layer insertSublayer:gradient atIndex:0];
    self.tintColor = UIColorFromRGB(0x00284B);
}

@end

The macro UIColorFromRGB is great for quickly setting colors from hex values. Also, you have to be sure to set the “tint” color to something appropriate, otherwise your nav buttons will retain the default look.

Now this caused an interesting problem: invisible buttons! UIBarButtonItem ’s would appear when first loaded, but disappear after returning from drill-down view controllers. The buttons would still work – all the normal events fired for them, but they weren’t rendered at all. Eventually, I found a way around that. Here’s the revised function:

- (void) drawRect:(CGRect)rect{
    [super drawRect:rect];
    CAGradientLayer *gradient = [CAGradientLayer layer];
    gradient.frame = self.bounds;
    UIColor *startColor = UIColorFromRGB(0x0d3660);
    UIColor *endColor = UIColorFromRGB(0x080f1d);
    gradient.colors = [NSArray arrayWithObjects:(id)[startColor CGColor], (id)[endColor CGColor], nil];

    UIGraphicsBeginImageContext(rect.size);
    [gradient renderInContext: UIGraphicsGetCurrentContext()];
    UIImage *image = UIGraphicsGetImageFromCurrentImageContext();
    UIGraphicsEndImageContext();

    [image drawInRect:rect];
    self.tintColor = UIColorFromRGB(0x00284B);
}

@end

This way creates a new context, renders the gradient to that context, then pulls the rendered image into a UIImage it can render into the UINavigationBar view. Ultimately, BarButtonItems must be rendered as sublayers, and rendered at layer zero. When the NavigationBar is first loaded, this is fine: the BarButton gets added after the initial rendering, bumping the gradient up to index one. But after a pushViewController / popViewController cycle, the gradient gets re-added as a layer at index 0, thus putting it in front of any buttons you’ve added since the initial rendering.

Drawing in image in the UINavigationBar doesn’t affect how it renders sublayers, so the buttons stay visible in this context.

All in all, it probably would have been easier to just use an image. Lesson learned. :/

side note: Can’t remember where I found the UIColorFromRGB macro, but I certainly didn’t invent it. Apologies to whoever did, but the relevant Google search is clogged with unattributed copies. Good on ya, though!
Update: I changed the code to:

CGSize constraintSize;constraintSize.width = 260.0f;constraintSize.height = MAXFLOAT;
NSString *theText = @"When in the Course of human events, it becomes 
necessary for one people to dissolve the political bands which have 
connected them with another, and to assume among the powers of the earth, 
the separate and equal station to which the Laws of Nature and of 
Nature's God entitle them, a decent respect to the opinions of mankind 
requires that they should declare the causes which impel them to the 
separation.";
CGSize theSize = [theText sizeWithFont:[UIFont systemFontOfSize:17.0f] constrainedToSize:constraintSize lineBreakMode:UILineBreakModeWordWrap];

theSize.height is 273. That seems more like it.

Turns out [NSString sizeWithFont: forWidth: wordWrap:] wasn't doing what I thought it was. Tip 'o the day!

I’ve been tinkering around the last days, creating a multi-line UITextView. I wanted a SMS-app like experience and needed a growing (and shrinking) textView.

Useful, though your text view will definitely need some customization afterwards to look good.

In git stash manpage you can read that (in "Discussion" section, just after "Options" description):

A stash is represented as a commit whose tree records the state of the working directory, and its first parent is the commit at HEAD when the stash was created.

So you can treat stash (e.g. stash@{0} is first / topmost stash) as a merge commit, and use:

$ git diff stash@{0}^1 stash@{0} -- <filename>

Explanation: stash@{0}^1 shortcut means first parent of given stash, which as stated in explanation above is commit at which changes were stashed away. We use this form of "git diff" (with two commits) because stash@{0} / refs/stash is a merge commit, and we have to tell git which parent we diff againts. More cryptic:

$ git diff stash@{0}^! -- <filename>

should also work (see git rev-parse manpage for explanation of rev^! syntax, in "Specifying ranges" section).

Likewise, you can use git checkout to check a single file out of the stash:

$ git checkout stash@{0} -- <filename>

or to save it under another filename:

$ git show stash@{0}:<full filename>  >  <newfile>

(note that here <full filename> is full pathname of a file relative to top directory of a project (think: relative to stash@{0})).

Progittip

f you want, you can actually extract the background image from a uisearch bar and make it a stretchable image to use as the background of a UITextField. I did the same thing and it works like a charm for me. Here's the code i used to extract it:

UIImage *img = [[[self.searchBar subviews] objectAtIndex:1] background];
NSData *imgdata = UIImagePNGRepresentation(img);
NSArray *searchPaths = NSSearchPathForDirectoriesInDomains(NSDocumentDirectory, NSUserDomainMask, YES); 
NSString *documentsDirectoryPath = [searchPaths objectAtIndex: 0];
[imgdata writeToFile:[documentsDirectoryPath stringByAppendingPathComponent:@"searchbarbg.png"] atomically:YES];

Nice!

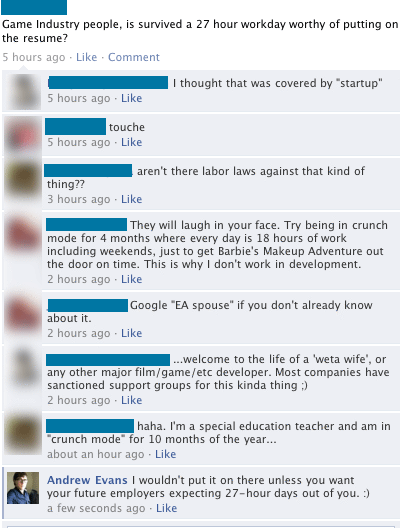
Fb_rage

I see people do this from time to time - play one-upsky on things that are totally stupid. I've heard game devs one-upping each other with crunch mode stories. Why would you be proud of how much your company overworks you? I guess it's "macho" that you "survived" a huge amount of stress, but wouldn't it have been better to avoid it in the first place?

Whenever I hear people one-upping each other, I always take it to its slippery-slope conclusion; that helps me notice how stupid these contests are. One-upping travel stories leads me to chime in with: "Well one time when I was on THE MOON, I met..." With crunch stories, I guess that would be - "Hah! I didn't sleep for FOUR MONTHS - or eat, or get laid, or anything! Just work work work, or it was the whip for me! So hardcore."

Also, seriously? EA, Activision, game devs everywhere? Read The Mythical Man-Month.

// Draws a disclosure indicator such that the tip of the arrow is at (x,y)
void BRDrawDisclosureIndicator(CGContextRef ctxt, CGFloat x, CGFloat y) {
static const CGFloat R = 4.5; // "radius" of the arrow head
static const CGFloat W = 3; // line width
CGContextSaveGState(ctxt);
CGContextMoveToPoint(ctxt, x-R, y-R);
CGContextAddLineToPoint(ctxt, x, y);
CGContextAddLineToPoint(ctxt, x-R, y+R);
CGContextSetLineCap(ctxt, kCGLineCapSquare);
CGContextSetLineJoin(ctxt, kCGLineJoinMiter);
CGContextSetLineWidth(ctxt, W);
CGContextStrokePath(ctxt);
CGContextRestoreGState(ctxt);
}

Useful - especially if you're just getting started manually drawing things. Here's the context and stroke color setting code I used just before calling this function (which I translated to an instance method in a category on UIView):

CGContextRef context = UIGraphicsGetCurrentContext();
if(!highlighted)
    CGContextSetStrokeColorWithColor(context, [[UIColor grayColor] CGColor]);
else
    CGContextSetStrokeColorWithColor(context, [[UIColor whiteColor] CGColor]);
Mastodon